

Welcome to Easy Home Recipes! We all know the struggle: dry, bland chicken breasts can turn a promising dinner into a disappointment. But what if I told you that achieving perfectly tender, incredibly juicy chicken breast is not only possible but surprisingly simple? This isn’t some chef’s secret reserved for fancy restaurants; it’s a straightforward method you can master in your own kitchen tonight. Imagine sinking your teeth into chicken so moist and flavorful, it practically melts in your mouth – every single time! Say goodbye to culinary frustration and hello to a new go-to recipe that will revolutionize your dinner rotation and delight your entire family. Let’s make cooking delicious, easy, and unforgettable!
Equipment Needed
- Cutting board
- Chef’s knife
- Meat mallet or rolling pin
- Large heavy-bottomed skillet (cast iron recommended)
- Tongs
- Instant-read thermometer
- Small mixing bowl
Ingredients
- 4 boneless, skinless chicken breasts (about 6-8 oz each)
- 2 tablespoons olive oil
- 1 teaspoon salt
- 1/2 teaspoon black pepper
- 1 teaspoon garlic powder
- 1 teaspoon onion powder
- 1/2 teaspoon paprika
- 1/2 teaspoon dried oregano (optional)
- 1/4 cup chicken broth or water (for pan sauce, optional)
- 1 tablespoon unsalted butter (for pan sauce, optional)
Instructions
- Prepare the Chicken: Pat the chicken breasts thoroughly dry with paper towels. Place each breast between two pieces of plastic wrap or parchment paper. Using a meat mallet or rolling pin, gently pound the thicker parts of the chicken until each breast is of even thickness, about 1/2 to 3/4 inch. This ensures even cooking.
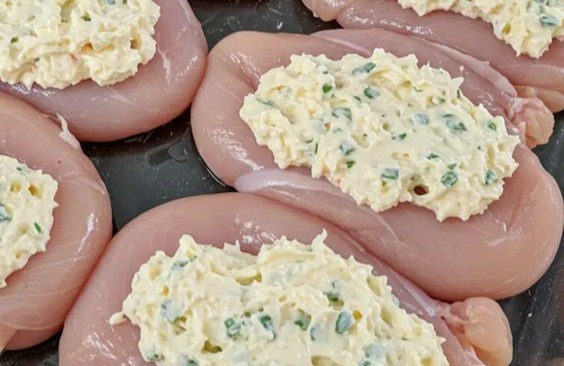
- Season: In a small bowl, combine salt, black pepper, garlic powder, onion powder, paprika, and dried oregano (if using). Drizzle the pounded chicken breasts with 1 tablespoon of olive oil, then generously sprinkle the seasoning mixture over both sides, pressing gently to adhere.
- Heat Skillet: Heat the remaining 1 tablespoon of olive oil in a large heavy-bottomed skillet over medium-high heat until shimmering and almost smoking. This is crucial for a good sear.
- Sear Chicken: Carefully place the seasoned chicken breasts in the hot skillet, ensuring not to overcrowd the pan (cook in batches if necessary). Sear for 5-7 minutes without moving, until a beautiful golden-brown crust forms.
- Flip and Finish: Flip the chicken breasts and reduce the heat to medium. Continue to cook for another 5-7 minutes, or until an instant-read thermometer inserted into the thickest part of the chicken registers 165°F (74°C). The exact time will depend on the thickness of your chicken.
- Rest: Transfer the cooked chicken breasts to a clean cutting board and tent loosely with foil. Let them rest for at least 5-10 minutes. This allows the juices to redistribute, ensuring incredibly moist chicken.
- Optional Pan Sauce: If desired, add chicken broth (or water) to the hot skillet, scraping up any browned bits from the bottom. Stir in butter until melted and slightly thickened. Serve the sauce over the rested chicken.
Tips & Variations
- Even Thickness is Key: For consistently juicy results, always pound your chicken breasts to an even thickness (around 1/2 to 3/4 inch). This ensures every part cooks perfectly at the same rate, preventing dry edges.
- Give Them Space: When searing, avoid overcrowding your skillet. Give the chicken enough room to develop that gorgeous golden-brown crust. If your pan is too full, the chicken will steam instead of sear, and we want that irresistible crispiness!
- Patience Pays Off: Don’t rush the rest! After cooking, letting your chicken rest for 5-10 minutes under foil allows the juices to redistribute throughout the meat, making it unbelievably tender and moist.
- Get Creative with Flavor: This basic method is a fantastic canvas! Feel free to swap out the seasoning blend for your favorite herbs, a zesty lemon-pepper mix, or even a smoky BBQ rub to keep things exciting.
- A Quick Brine Boost: For an extra layer of moisture insurance, consider a simple brine (1 tbsp salt per 1 cup water for 15-30 mins) before seasoning and cooking. It’s an easy step that yields incredible results!
Serving & Storage Suggestions
These melt-in-your-mouth chicken breasts are a dream come true for easy meal planning, offering incredible versatility. They shine as the main protein, sliced beautifully and fanned out on a plate, perhaps with a drizzle of the optional pan sauce or a squeeze of fresh lemon to brighten things up. Pair them with simple sides like fluffy rice, steamy green beans, a crisp garden salad, or creamy pasta for a complete and satisfying meal. For lunch, cube any leftovers and toss them into a vibrant salad, tuck them into a sandwich, or even shred for quick tacos. Store any remaining cooked chicken in an airtight container in the fridge for up to 3-4 days, making future meals a breeze.
And just like that, you’ve unlocked the secret to chicken breasts so incredibly juicy and tender, they’ll become a family favorite for sure! At Easy Home Recipes, we believe delicious cooking should be simple and stress-free, and this recipe absolutely delivers. I can’t wait for you to try it! Please share your thoughts and photos in the comments below – your kitchen triumphs inspire us all. Happy cooking, everyone!
How to Make Your Mouth Chicken Breast
Get ready for the easiest, most flavorful, and incredibly juicy chicken breasts that practically melt in your mouth – perfect for any weeknight!
Ingredients
- 4 boneless, skinless chicken breasts (about 6-8 oz each)
- 2 tablespoons olive oil
- 1 teaspoon salt
- 1/2 teaspoon black pepper
- 1 teaspoon garlic powder
- 1 teaspoon onion powder
- 1/2 teaspoon paprika
- 1/2 teaspoon dried oregano (optional)
- 1/4 cup chicken broth or water (for pan sauce, optional)
- 1 tablespoon unsalted butter (for pan sauce, optional)
Instructions
- Prepare the Chicken: Pat the chicken breasts thoroughly dry with paper towels. Place each breast between two pieces of plastic wrap or parchment paper. Using a meat mallet or rolling pin, gently pound the thicker parts of the chicken until each breast is of even thickness, about 1/2 to 3/4 inch. This ensures even cooking.
- Season: In a small bowl, combine salt, black pepper, garlic powder, onion powder, paprika, and dried oregano (if using). Drizzle the pounded chicken breasts with 1 tablespoon of olive oil, then generously sprinkle the seasoning mixture over both sides, pressing gently to adhere.
- Heat Skillet: Heat the remaining 1 tablespoon of olive oil in a large heavy-bottomed skillet over medium-high heat until shimmering and almost smoking. This is crucial for a good sear.
- Sear Chicken: Carefully place the seasoned chicken breasts in the hot skillet, ensuring not to overcrowd the pan (cook in batches if necessary). Sear for 5-7 minutes without moving, until a beautiful golden-brown crust forms.
- Flip and Finish: Flip the chicken breasts and reduce the heat to medium. Continue to cook for another 5-7 minutes, or until an instant-read thermometer inserted into the thickest part of the chicken registers 165°F (74°C). The exact time will depend on the thickness of your chicken.
- Rest: Transfer the cooked chicken breasts to a clean cutting board and tent loosely with foil. Let them rest for at least 5-10 minutes. This allows the juices to redistribute, ensuring incredibly moist chicken.
- Optional Pan Sauce: If desired, add chicken broth (or water) to the hot skillet, scraping up any browned bits from the bottom. Stir in butter until melted and slightly thickened. Serve the sauce over the rested chicken.
