
Step-by-Step Instructions
- Prepare the biscuits: If making biscuits from scratch, bake and let them cool completely. If using store-bought, lay them out on a baking sheet lined with parchment paper.
- Make the icing: In a medium mixing bowl, whisk together the powdered sugar, 3 tablespoons of milk, and vanilla extract (if using) until smooth and thick. If it’s too thick, add more milk a teaspoon at a time until you reach a pourable but still thick consistency (it should spread but not run off the biscuit).
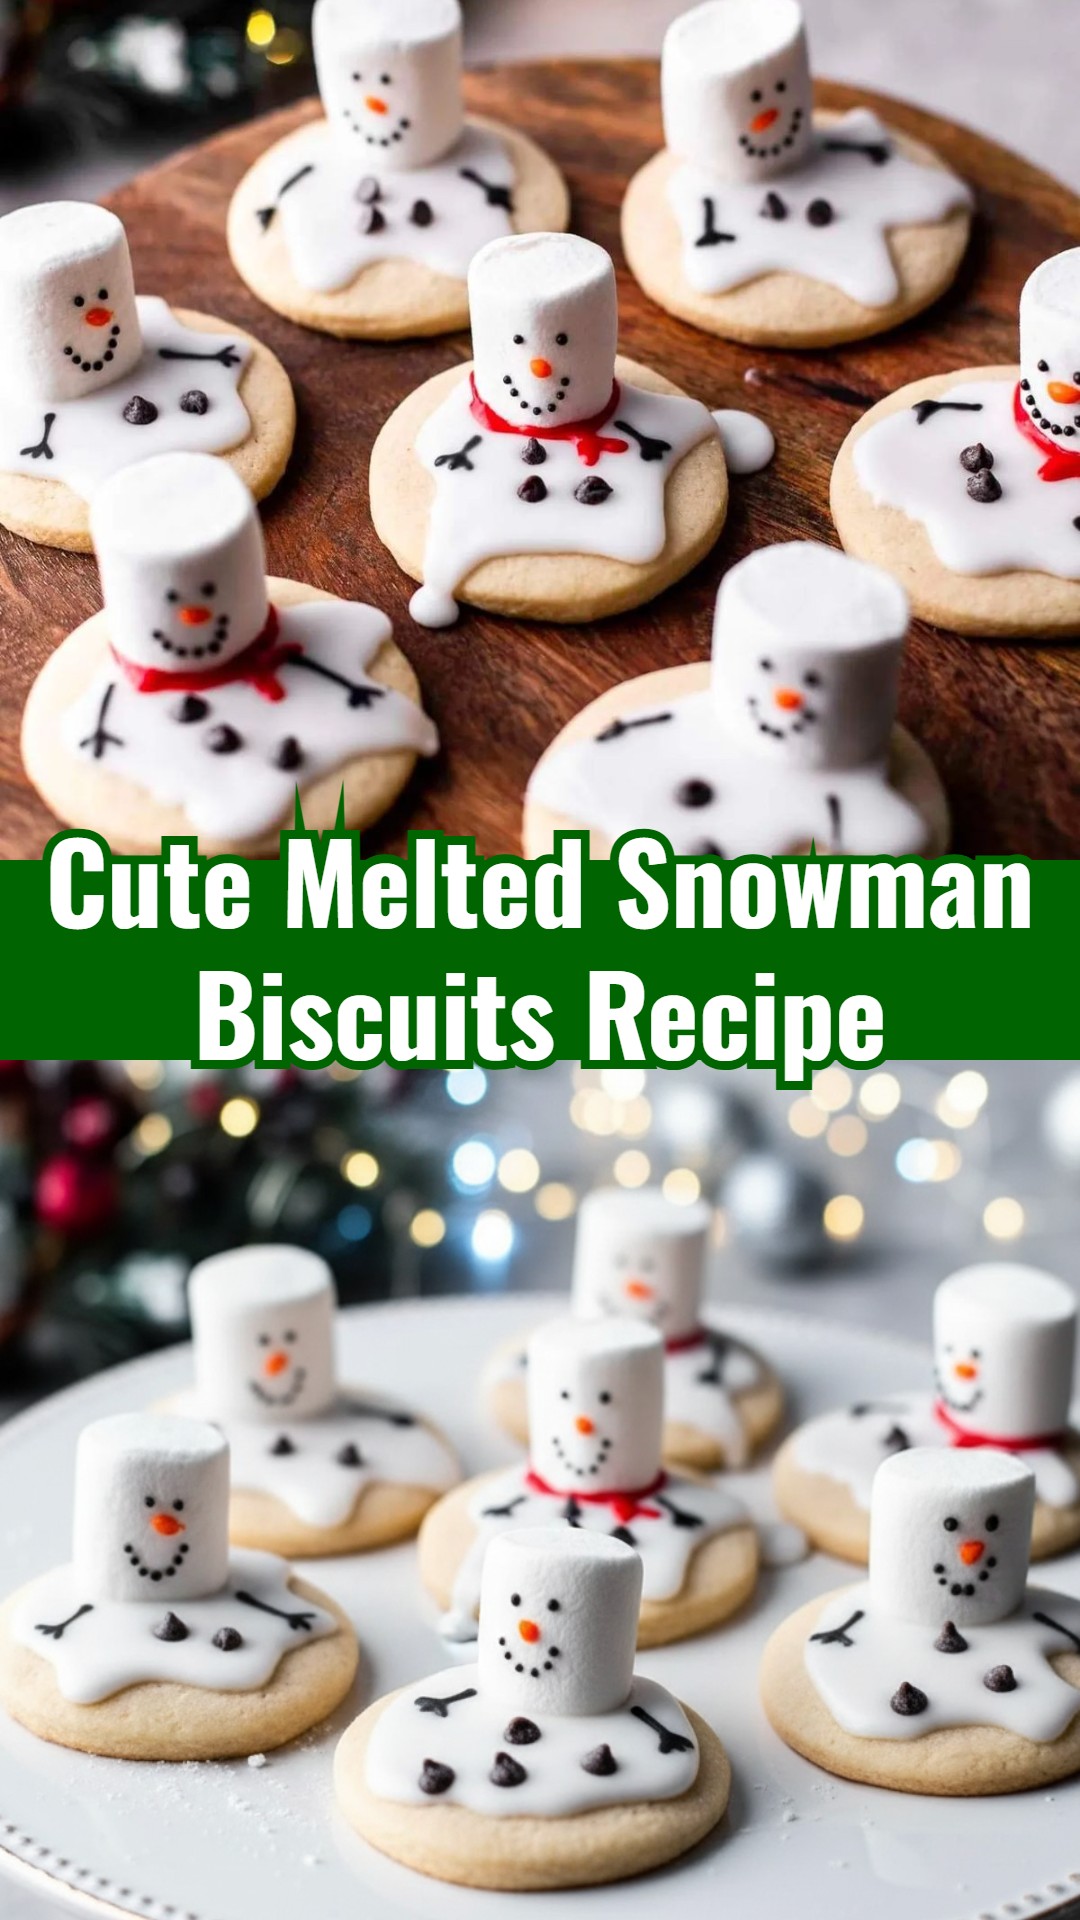
- Create the snowman ‘puddle’: Spoon a generous amount of white icing onto the top of each biscuit. Use the back of a spoon or a small spatula to spread the icing unevenly, creating the appearance of a melted puddle with a slightly thicker, rounder ‘head’ area at the top of the biscuit. Let the icing set slightly for about 5-10 minutes.
- Add the snowman’s head: While the ‘puddle’ is still slightly wet, carefully place a dollop of white icing in the top-center of each biscuit to form the snowman’s head. You can also use a mini marshmallow for the head if preferred, gently pressing it onto the wet icing.
- Decorate the face: Using the black edible marker or black gel icing, draw two dots for eyes and a dotted smile onto the snowman’s ‘head’.
- Add the nose: For the nose, either mix a tiny drop of orange food coloring into a small amount of leftover white icing and pipe a small carrot shape, or carefully place a tiny sliver of carrot onto the face.
- Add arms and buttons: Break pretzel sticks in half and gently insert two pieces into the sides of the ‘puddle’ icing for arms. Add small candy pieces for buttons down the snowman’s body.
- Create a scarf: Use a thin strip of fruit leather or small sprinkles to create a colorful ‘scarf’ around the snowman’s neck.
- Allow to set: Let the melted snowman biscuits sit at room temperature for at least 30 minutes to an hour (or longer if the icing is very thick) until the icing is completely set before serving or storing.
Full Ingredients
- 12 plain round biscuits (digestive biscuits, shortbread, or sugar cookies work great; store-bought for ease, or homemade)
- 2 cups powdered sugar
- 3-4 tablespoons milk (or water)
- 1/2 teaspoon vanilla extract (optional)
- Small amount of orange food coloring (or a tiny piece of carrot for the nose)
- Black edible marker or black gel icing for eyes and mouth
- Pretzel sticks for arms
- Small candy pieces for scarves and buttons (e.g., M&M’s Minis, sprinkles, fruit leather strips)
Shopping List
- Pantry: Plain round biscuits (digestive, shortbread, or sugar cookies), Powdered sugar, Vanilla extract, Pretzel sticks
- Dairy & Eggs: Milk
- Baking & Decorating: Black edible marker or black gel icing, Orange food coloring
- Candy & Snacks: Small candy pieces (M&M’s Minis, sprinkles, fruit leather strips), Tiny carrot (optional)
Equipment Needed
- Baking sheet
- Parchment paper
- Mixing bowls
- Spatula or butter knife
- Small round cookie cutter (optional, if making biscuits from scratch)
Variations & Serving Ideas
These utterly charming Melted Snowman Biscuits are the star of any holiday spread! Present them proudly on a vibrant festive platter as a whimsical centerpiece for your Christmas party, or tuck a few onto a plate as a very special treat for Santa Claus on Christmas Eve. They also make incredibly thoughtful and delightful edible gifts; simply arrange a few in clear cellophane bags, tie with a festive ribbon, and share the joy with friends and neighbors. To store any leftovers, ensure the icing has completely firmed up – this is crucial to prevent sticking. Once fully set, place them in a single layer or separate layers with parchment paper in an airtight container at room temperature for up to 3-5 days. Avoid stacking directly on top of each other until completely dry to preserve their adorable designs.
I truly hope these adorable Melted Snowman Biscuits bring a cascade of smiles and a generous sprinkle of holiday cheer directly into your home! They’re a delightful testament to how easy and enjoyable Christmas cooking can be. We’d absolutely love to see your magical creations and hear all about the fun you had making them, so please share your photos and comments below!#ChristmasCookiesEasy #KidsChristmasParty #XmasFood #ChristmasCooking #ChristmasPartyFood #ChristmasSnacks #ChristmasGoodies #EasyCookieRecipes #CookingWithKids
