
Are you ready to bake a birthday cake that looks like it came straight from a charming, old-fashioned bakery, yet is surprisingly simple to create at home? This “Aesthetic Vintage Birthday Cake with Bows” recipe is your ticket to crafting a truly special dessert for any celebration. Forget complicated techniques; we’re focusing on approachable steps to achieve a show-stopping result. Whether it’s an 18th, 19th, 20th, or 22nd birthday, or any milestone that calls for a touch of elegance, this cake delivers. Its delicate buttercream bows evoke a timeless, whimsical charm, perfect for creating those picture-perfect moments and unforgettable memories. Get ready to impress your loved ones with a cake that’s not just delicious, but also a beautiful, homemade work of art!
Helpful Tips
- Room Temperature Magic for Batter and Frosting: For the smoothest, most emulsified batter and frosting, always ensure your butter, eggs, and milk are at room temperature. Cold ingredients can cause your batter to curdle and your frosting to be lumpy, while room temp ingredients blend together beautifully, resulting in a lighter, more tender cake and a perfectly creamy buttercream. Take them out of the fridge at least an hour before you plan to bake!
- Mastering the Art of Buttercream Bows: Piping delicate bows might seem intimidating, but practice makes perfect! Before decorating your actual cake, practice piping bows on a piece of parchment paper. This allows you to get a feel for the pressure and movement needed. For intricate designs, a slightly firmer buttercream works best – if yours is too soft, add a little extra sifted powdered sugar, one tablespoon at a time, until it holds its shape beautifully. For an authentic vintage feel, consider adding tiny piped pearls or elegant swags between your bows.
- Playing with Color and Design: Embrace the aesthetic possibilities! For a vibrant look, use high-quality gel food coloring to achieve a rich red buttercream for your bows, or even for the entire cake. If you’re aiming for a classic red and white birthday cake, simply use plain white frosting with bright red bows. Don’t limit yourself to bows; small piped details, scallops, or simple borders can enhance the vintage charm.
- Bento Cake Inspiration for Smaller Celebrations: If you’re baking for a more intimate gathering or love the trendy bento cake look, consider scaling this recipe down for smaller 6-inch cakes or individual mini cakes. When going smaller, use a finer petal tip for daintier bows and details to maintain that delicate aesthetic.
- Flavor Boosts and Creative Twists: Don’t be afraid to customize! Elevate your cake’s flavor by adding a teaspoon of lemon or orange zest to the cake batter for a brighter, more refreshing taste. For the buttercream, a hint of almond extract alongside the vanilla can introduce a sophisticated, nuanced flavor profile that will delight your taste buds.

Step-by-Step Instructions
- Prepare Cake Pans: Preheat oven to 350°F (175°C). Grease and flour two 8-inch round cake pans, or line the bottoms with parchment paper and grease the sides.
- Combine Dry Ingredients: In a medium bowl, whisk together the flour, baking powder, and salt. Set aside.
- Cream Butter and Sugar: In the bowl of a stand mixer fitted with the paddle attachment (or using a hand mixer), cream the softened butter and granulated sugar on medium-high speed until light and fluffy, about 3-5 minutes.
- Add Eggs: Add eggs one at a time, beating well after each addition until fully incorporated. Scrape down the sides of the bowl as needed.
- Alternate Dry and Wet Ingredients: Reduce speed to low. Gradually add the dry ingredients to the wet ingredients in three additions, alternating with the milk in two additions, beginning and ending with the dry ingredients. Mix until just combined, being careful not to overmix. Stir in the vanilla extract.
- Bake Cakes: Divide the batter evenly between the prepared cake pans. Bake for 30-35 minutes, or until a wooden skewer inserted into the center comes out clean.
- Cool Cakes: Let cakes cool in the pans for 10-15 minutes before inverting them onto a wire cooling rack to cool completely. This is crucial before frosting!
- Make Buttercream: While cakes cool, make the buttercream. In a large bowl, beat the softened butter until creamy. Gradually add the sifted powdered sugar, alternating with milk/cream and vanilla extract, beating on low speed until combined, then increase to medium-high and beat until light and fluffy. Add a pinch of salt. If using, tint a small portion of the frosting red for bows (Aesthetic Red Birthday Cake).
- Assemble and Crumb Coat: Once cakes are completely cool, level them if necessary. Place one cake layer on your serving plate or cake stand. Spread a thin layer of buttercream on top. Place the second cake layer on top. Apply a thin layer of frosting all over the cake (the “crumb coat”) to seal in any loose crumbs. Chill in the refrigerator for 15-20 minutes to set.
- Final Frosting: Apply a thicker, even layer of buttercream over the entire cake. Use an offset spatula or bench scraper to smooth the sides and top.
- Decorate with Bows: Fill a piping bag fitted with a petal tip (like Wilton 104 or 125) with your chosen color of buttercream for the bows. Pipe delicate bows around the sides or top of the cake. You can also use a small round tip for details or a star tip for borders. Get creative with your Vintage Bento Cake design!
Ingredients
- 2 ½ cups all-purpose flour
- 2 teaspoons baking powder
- ½ teaspoon salt
- 1 cup unsalted butter, softened (2 sticks)
- 2 cups granulated sugar
- 4 large eggs, room temperature
- 1 cup whole milk, room temperature
- 2 teaspoons vanilla extract
- 4-5 cups powdered sugar, sifted
- 1-2 tablespoons whole milk or heavy cream (for frosting)
- 1 teaspoon vanilla extract (for frosting)
- Pinch of salt (for frosting)
- Red gel food coloring (optional)
Aesthetic Vintage Birthday Cake with Bows
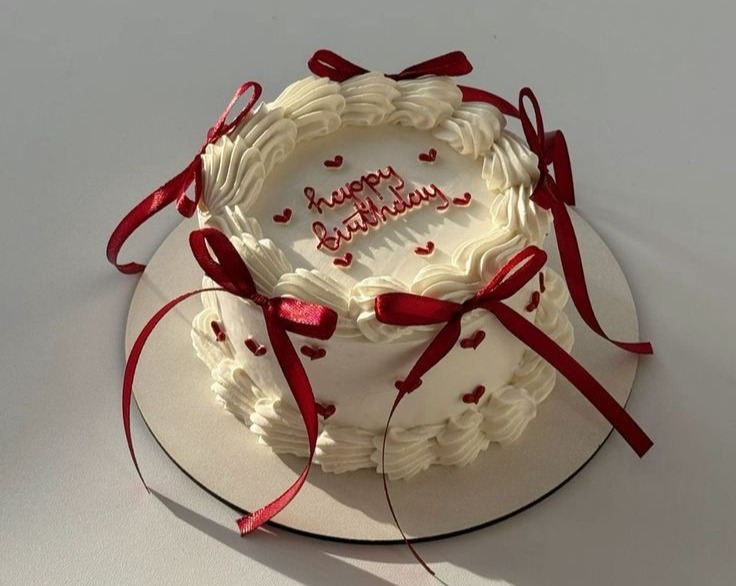
Craft a memorable celebration with this easy-to-follow recipe for a stunning vintage-inspired birthday cake, adorned with beautiful buttercream bows.
Ingredients
- 2 ½ cups all-purpose flour
- 2 teaspoons baking powder
- ½ teaspoon salt
- 1 cup unsalted butter, softened (2 sticks)
- 2 cups granulated sugar
- 4 large eggs, room temperature
- 1 cup whole milk, room temperature
- 2 teaspoons vanilla extract
- 4-5 cups powdered sugar, sifted
- 1-2 tablespoons whole milk or heavy cream (for frosting)
- 1 teaspoon vanilla extract (for frosting)
- Pinch of salt (for frosting)
- Red gel food coloring (optional)
Instructions
- Prepare Cake Pans: Preheat oven to 350°F (175°C). Grease and flour two 8-inch round cake pans, or line the bottoms with parchment paper and grease the sides.
- Combine Dry Ingredients: In a medium bowl, whisk together the flour, baking powder, and salt. Set aside.
- Cream Butter and Sugar: In the bowl of a stand mixer fitted with the paddle attachment (or using a hand mixer), cream the softened butter and granulated sugar on medium-high speed until light and fluffy, about 3-5 minutes.
- Add Eggs: Add eggs one at a time, beating well after each addition until fully incorporated. Scrape down the sides of the bowl as needed.
- Alternate Dry and Wet Ingredients: Reduce speed to low. Gradually add the dry ingredients to the wet ingredients in three additions, alternating with the milk in two additions, beginning and ending with the dry ingredients. Mix until just combined, being careful not to overmix. Stir in the vanilla extract.
- Bake Cakes: Divide the batter evenly between the prepared cake pans. Bake for 30-35 minutes, or until a wooden skewer inserted into the center comes out clean.
- Cool Cakes: Let cakes cool in the pans for 10-15 minutes before inverting them onto a wire cooling rack to cool completely. This is crucial before frosting!
- Make Buttercream: While cakes cool, make the buttercream. In a large bowl, beat the softened butter until creamy. Gradually add the sifted powdered sugar, alternating with milk/cream and vanilla extract, beating on low speed until combined, then increase to medium-high and beat until light and fluffy. Add a pinch of salt. If using, tint a small portion of the frosting red for bows (Aesthetic Red Birthday Cake).
- Assemble and Crumb Coat: Once cakes are completely cool, level them if necessary. Place one cake layer on your serving plate or cake stand. Spread a thin layer of buttercream on top. Place the second cake layer on top. Apply a thin layer of frosting all over the cake (the 'crumb coat') to seal in any loose crumbs. Chill in the refrigerator for 15-20 minutes to set.
- Final Frosting: Apply a thicker, even layer of buttercream over the entire cake. Use an offset spatula or bench scraper to smooth the sides and top.
- Decorate with Bows: Fill a piping bag fitted with a petal tip (like Wilton 104 or 125) with your chosen color of buttercream for the bows. Pipe delicate bows around the sides or top of the cake. You can also use a small round tip for details or a star tip for borders. Get creative with your Vintage Bento Cake design!
Shopping List
Produce
- None
Dairy & Eggs
- 1 cup unsalted butter (2 sticks)
- 4 large eggs
- 1 cup whole milk
- Red gel food coloring (optional)
Pantry
- 2 ½ cups all-purpose flour
- 2 teaspoons baking powder
- ½ teaspoon salt
- 2 cups granulated sugar
- 4-5 cups powdered sugar
- 3 teaspoons vanilla extract (total)
Equipment Needed
- Stand mixer (or hand mixer)
- Two 8-inch round cake pans
- Parchment paper
- Mixing bowls
- Spatulas
- Whisk
- Measuring cups and spoons
- Wire cooling rack
- Offset spatula or palette knife
- Piping bags
- Piping tips (e.g., Wilton 1M or star tip for borders, small round tip for details, petal tip for bows)
Variations & Serving Ideas
This enchanting Birthday Cake with Bows is truly a showstopper and deserves a presentation that highlights its beauty! Serve it proudly as the centerpiece of your celebration, perhaps on a vintage-inspired cake stand, surrounded by fresh flowers, delicate fairy lights, or coordinating party favors. When it’s time to slice, use a sharp, warm knife for clean cuts – warming the knife under hot water and wiping it dry between slices works wonders. For storing leftovers, keep your beautiful creation fresh by covering it securely with a cake dome or plastic wrap. It will stay delicious at room temperature for up to 2-3 days, or you can refrigerate it for up to 5 days. Remember, if refrigerated, let the cake sit out for about 30 minutes before serving to bring it back to optimal texture and flavor.
I truly hope this recipe empowers you to create a magnificent and memorable birthday cake right in your own kitchen! There’s an unparalleled joy in baking something so beautiful and delicious from scratch, especially when it’s adorned with such charming, handmade details. Please don’t hesitate to share your wonderful creations and any baking stories with us – we absolutely love seeing your stunning bow cakes come to life! Happy baking, and here’s to many sweet celebrations!#18thBirthdayCakeVintage #BentoCakeDesignBirthdayAesthetic #Vintage20thBirthdayCake #AestheticRedBirthdayCake #BirthdayCake19thBirthday #BentoVintageCake #BentoCake22Birthday #19thBirthdayCake #RedAndWhiteBirthdayCake
