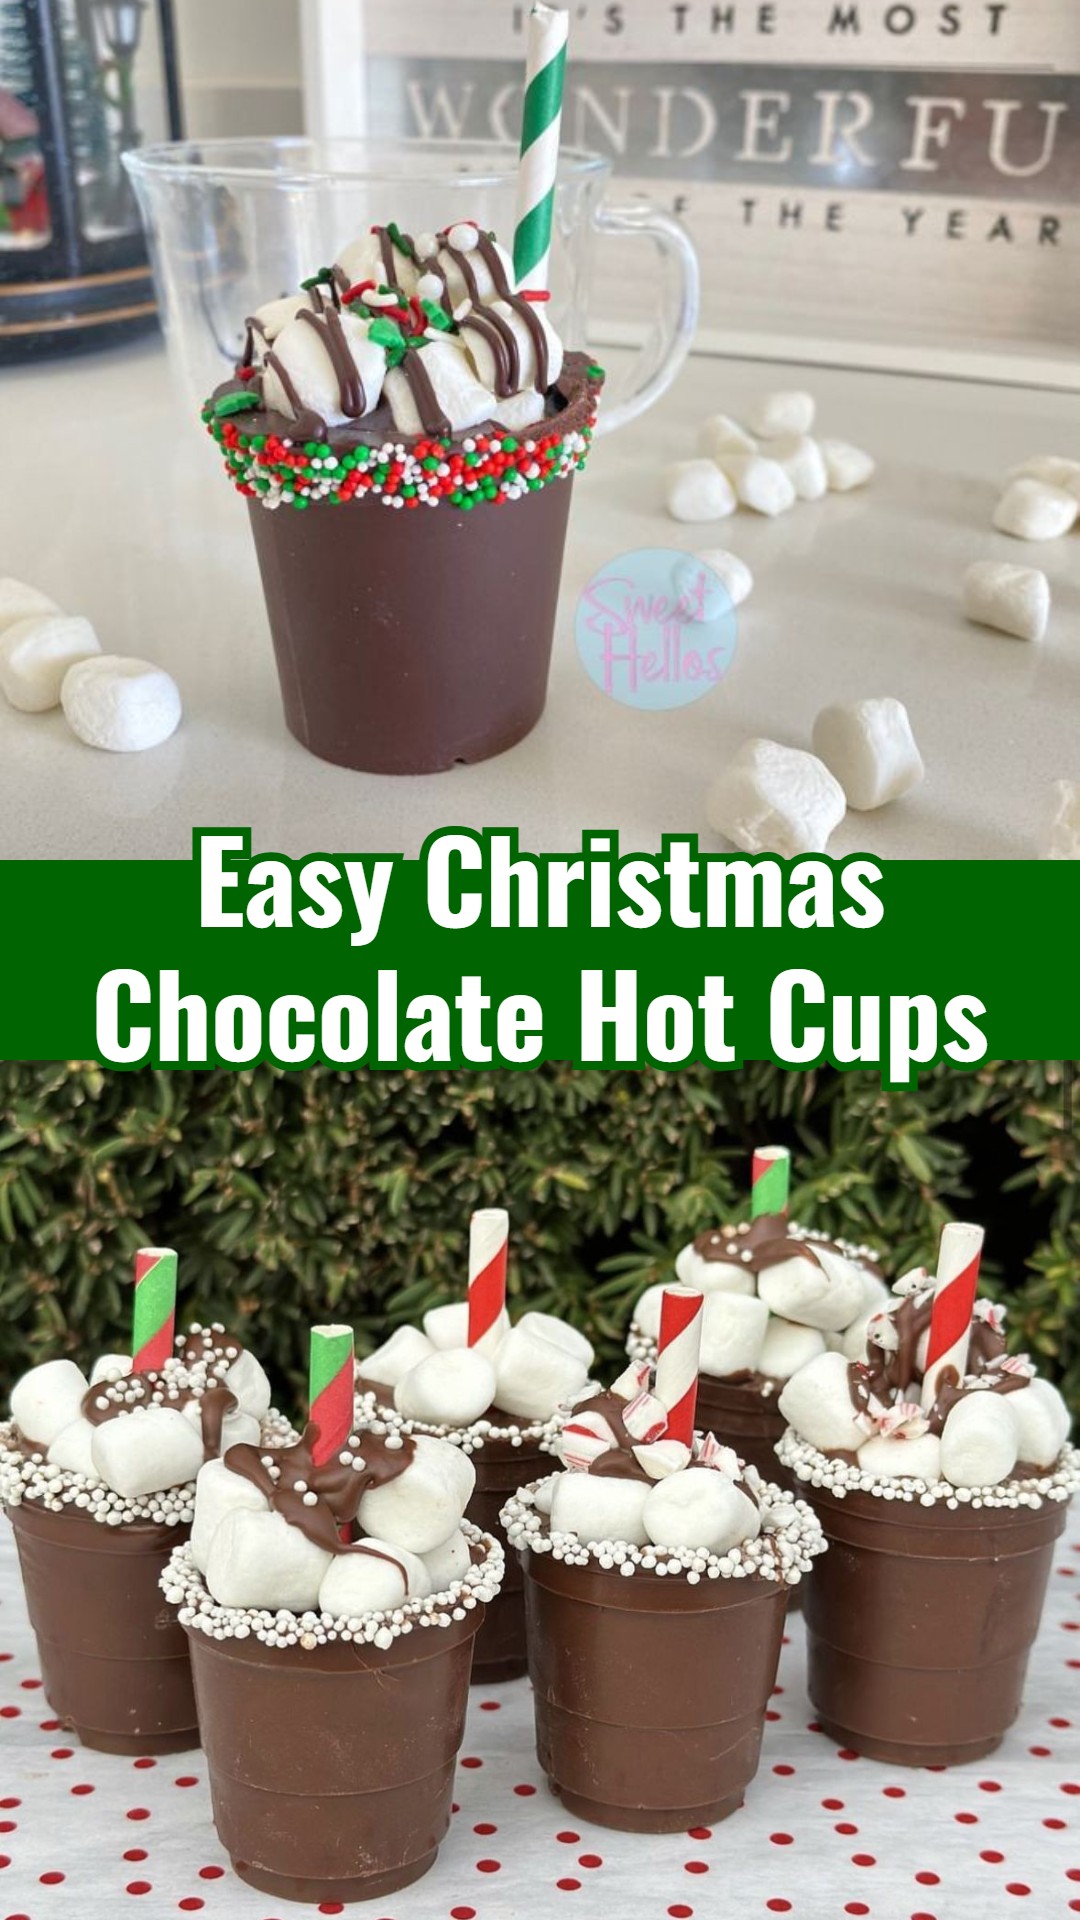
The holiday season is here, and what could be better than spreading warmth and joy with a homemade treat that’s surprisingly simple to make? These Christmas Chocolate Hot Cups are a fantastic way to bring a little magic into your kitchen without any fuss. At Easy Home Recipes, we love finding ways to make festive celebrations stress-free, and these delightful cups fit the bill perfectly. Imagine the delight as a rich chocolate shell melts into a creamy, comforting mug of hot cocoa, revealing a hidden surprise of marshmallows. They’re a fantastic project for a fun afternoon with the family, requiring minimal effort but delivering maximum impact. Whether you’re planning unique edible gifts for friends, looking for easy Christmas treats to sell, or simply want a special moment for yourself, these hot cups are a must-try. Get ready to create heartwarming holiday memories with ease!
Equipment Needed
- Silicone sphere molds (or muffin liners for a less ‘cup’ shape)
- Microwave-safe bowls
- Spoon or pastry brush
- Small saucepan
- Mugs
Ingredients
- 12 oz good quality melting chocolate (milk, dark, or white)
- 1 cup hot chocolate mix (your favorite brand)
- 1 cup mini marshmallows
- Optional: Sprinkles
- Optional: Crushed candy canes
- Optional: Chocolate drizzle
- Optional: Cocoa powder
- Optional: Cinnamon stick for garnish
Shopping List
- Pantry: 12 oz melting chocolate (milk, dark, or white), 1 cup hot chocolate mix, 1 cup mini marshmallows
- Baking & Decorating: Sprinkles (optional), crushed candy canes (optional)
- Spices: Cocoa powder (optional), cinnamon sticks (optional)
Instructions
- Melt the chocolate: Place melting chocolate in a microwave-safe bowl. Microwave in 30-second intervals, stirring after each, until smooth and fully melted. Alternatively, use a double boiler.
- Coat the molds: Spoon a small amount of melted chocolate into each cavity of your silicone sphere mold. Using the back of the spoon or a pastry brush, spread the chocolate evenly up the sides of the mold, ensuring no thin spots. Repeat for all cavities, making sure to create at least two halves per hot cup. For a ‘cup’ shape, you only need one half per cup, but ensure the rim is thick enough.
- Chill: Place the molds in the refrigerator for 10-15 minutes, or until the chocolate is firm and easily releases from the mold.
- Assemble the cups: Carefully remove the chocolate halves from the molds. Fill half of your chocolate shells with 2 tablespoons of hot chocolate mix and a generous handful of mini marshmallows. Add any desired sprinkles or crushed candy canes.
- Seal the cups: Warm a clean, empty plate or a flat pan in the microwave for a few seconds. Take an empty chocolate half and gently press its rim onto the warm plate for a second or two to slightly melt the edge. Immediately press this warmed edge onto the filled chocolate half to create a sealed sphere or cup. If making a ‘hot cup’ where you only use one half, ensure the rim is sturdy.
- Decorate (optional): Drizzle with extra melted chocolate, sprinkle with more festive decorations, or dust with cocoa powder. Let them set completely.
Tips & Variations
- Choose Quality Chocolate: For the smoothest melt and best flavor, always opt for good quality melting chocolate or wafers. It makes a big difference for easy handling and a delicious result.
- Even Coating for Easy Melting: Ensure your chocolate shells have an even thickness, not too thick, so they melt beautifully when hot milk is added. A quick second layer can reinforce any thin spots.
- Get Creative with Fillings: While marshmallows are a classic, feel free to experiment! Try a sprinkle of peppermint, a mini caramel square, or even a dash of cinnamon for a unique twist.
- Simple Storage: Keep your finished hot cups in an airtight container in a cool, dry spot. This prevents them from melting and keeps them fresh for longer.
- Gifting Made Easy: For effortless gifting, package individual hot cups in clear bags, tied with a festive ribbon. Don’t forget to include a small tag with instructions for brewing!
Serving & Storage Suggestions
Serving these delightful Christmas Chocolate Hot Cups couldn’t be easier for your home. Simply present them in charming mugs, ready for your loved ones to pour steaming hot milk over them. It’s a fun, interactive way to enjoy a rich and decadent hot chocolate. For an extra touch, offer a side of whipped cream, more sprinkles, a peppermint stick, or a cinnamon stick. They make wonderful, simple additions to any holiday gathering or a thoughtful edible gift. To store leftovers, simply place them in an airtight container at room temperature, away from direct heat or sunlight, where they’ll stay fresh for up to two weeks.
I truly hope you enjoy bringing these magical and easy Christmas Chocolate Hot Cups to life in your own kitchen! They are such a fantastic way to add a festive touch to your holidays without the stress. We at Easy Home Recipes love seeing your creations, so please share your thoughts and any creative fillings you tried in the comments below. Happy holidays and happy, easy cooking!#ChristmasTreatsRecipesEasy #ChristmasFoodIdeasRecipes #ChocolateChristmasRecipes #EasyChristmasTreatsToSell #FallGoodiesDessertRecipes #TreatsChristmas #XmasSweetsGiftIdeas #ChristmasHotChocolateIdeas #WhatToMakeForChristmas
Easy Christmas Chocolate Hot Cups Festive Treat Ideas

Discover how simple it is to create festive Christmas Chocolate Hot Cups, ideal for effortless holiday gifting or a cozy, delicious hot chocolate experience right in your home.
Ingredients
- 12 oz good quality melting chocolate (milk, dark, or white)
- 1 cup hot chocolate mix (your favorite brand)
- 1 cup mini marshmallows
- Optional: Sprinkles
- Optional: Crushed candy canes
- Optional: Chocolate drizzle
- Optional: Cocoa powder
- Optional: Cinnamon stick for garnish
Instructions
- Melt the chocolate: Place melting chocolate in a microwave-safe bowl. Microwave in 30-second intervals, stirring after each, until smooth and fully melted. Alternatively, use a double boiler.
- Coat the molds: Spoon a small amount of melted chocolate into each cavity of your silicone sphere mold. Using the back of the spoon or a pastry brush, spread the chocolate evenly up the sides of the mold, ensuring no thin spots. Repeat for all cavities, making sure to create at least two halves per hot cup. For a 'cup' shape, you only need one half per cup, but ensure the rim is thick enough.
- Chill: Place the molds in the refrigerator for 10-15 minutes, or until the chocolate is firm and easily releases from the mold.
- Assemble the cups: Carefully remove the chocolate halves from the molds. Fill half of your chocolate shells with 2 tablespoons of hot chocolate mix and a generous handful of mini marshmallows. Add any desired sprinkles or crushed candy canes.
- Seal the cups: Warm a clean, empty plate or a flat pan in the microwave for a few seconds. Take an empty chocolate half and gently press its rim onto the warm plate for a second or two to slightly melt the edge. Immediately press this warmed edge onto the filled chocolate half to create a sealed sphere or cup. If making a 'hot cup' where you only use one half, ensure the rim is sturdy.
- Decorate (optional): Drizzle with extra melted chocolate, sprinkle with more festive decorations, or dust with cocoa powder. Let them set completely.
